Repair guide: Apple iPhone 4G disassembly.
The world's most wanted device is now in our hands. The iPhone 4 is visibly different from its predecessors, in that it's got a more square shape, a microSIM slot on its side, and circular volume buttons on the left. In addition to the standard features of an iPhone (cellular data connection and WiFi, iPod, multitouch screen, App Store support, GPS, etc.). New Apple iPhone 4G fitted up with Apple A4 processor, a 3.5-inch, 960 x 480 display, with greater pixel density in the screen, leading to higher-quality images, 2 cameras - front- and back-facing, with LED camera flash for back camera, 5 megapixel camera, FaceTime video calls, 24% thinner than iPhone 3GS, new body design, featuring glass front and back and steel sides.
Necessary tools for disassembly of Apple iPhone 4:
First remove the sim and sim tray from your phone. If you don't have the original pin that came with the phone, use the end of a paperclip.
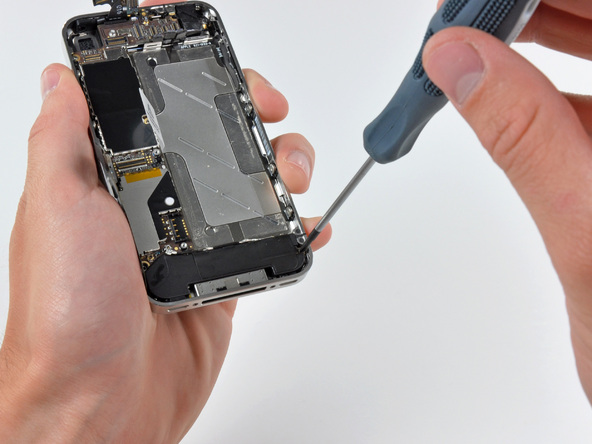
Now remove the two screws at the bottom of the phone. The iPhone 4 have pentalobe (star shaped) screws.
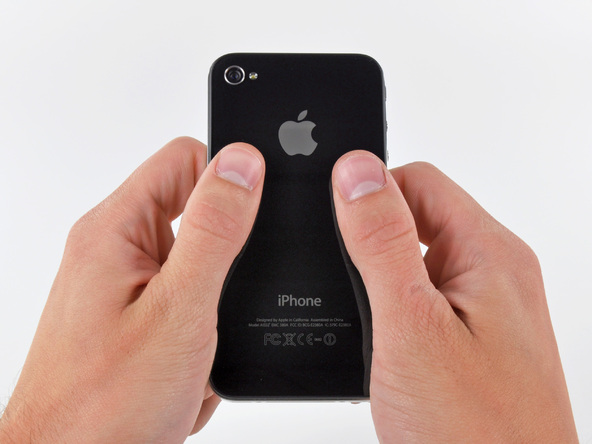
Turn your phone over and push the battery cover in the direction shown by the arrows in order to remove it.
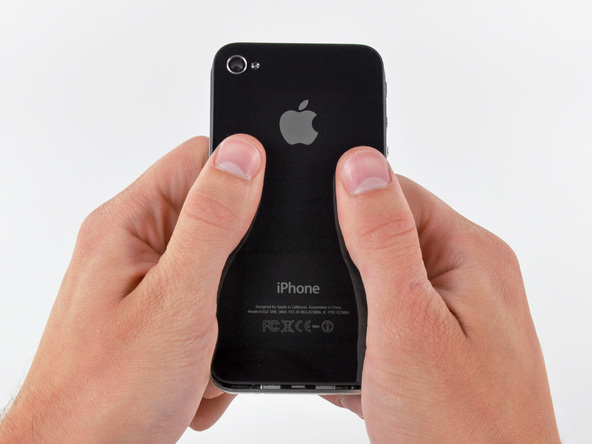
With the battery cover removed, your phone should look like below. Remove the circled screw. The cover for the battery connector will come away with the screw.
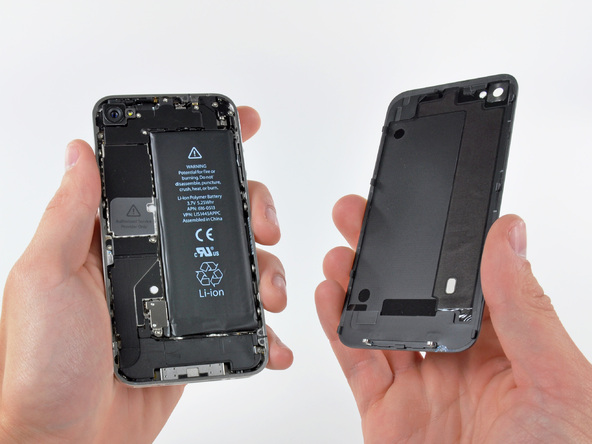
Below you can see the cover for the battery connector having been removed. To release the battery connector, simply lever it up away from the phone. It has a simple plug and socket type connection. Below you can see the disconnected plug. Now remove the battery by pulling the transparent tab.
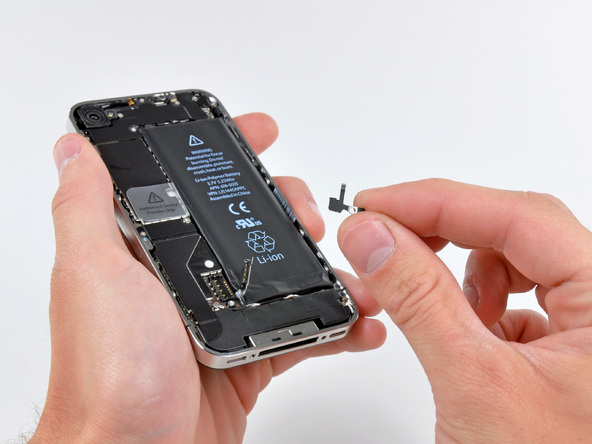
With the battery removed your phone should look like below. Remove the five circled screws in order to release the EMI shield.
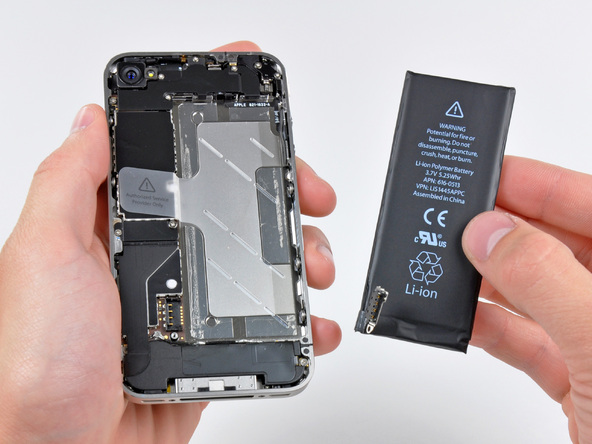
With the EMI shield removed, your phone should look like below.
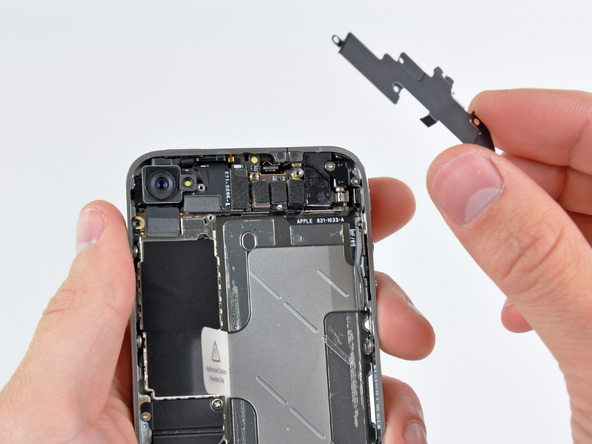
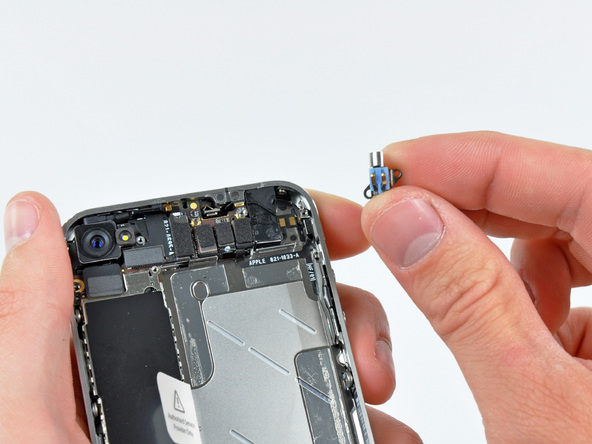
Next remove the two circled screws and lift the vibrating motor out. Six ribbon cables need disconnecting. They all have a plug and socket type connector and can be levered up, away from the circuit board. Once you've disconnected the ribbon on the far left you can lift the camera away.
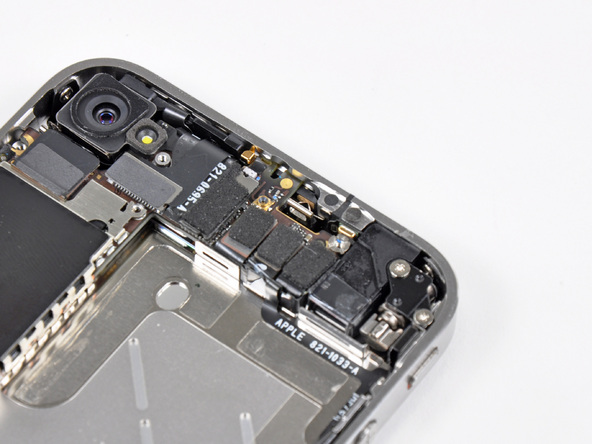
With the camera, vibrating motor and ribbons disconnected, your phone should look like below.
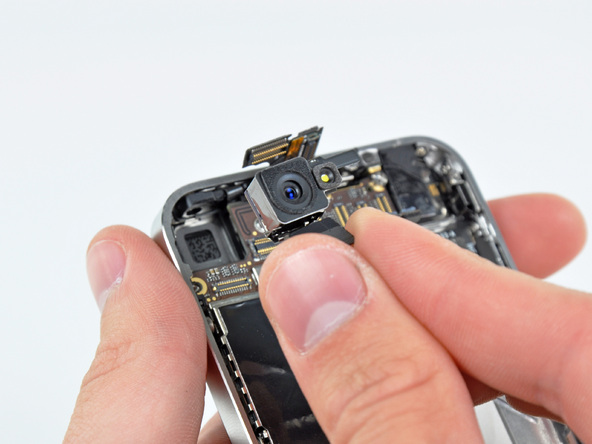
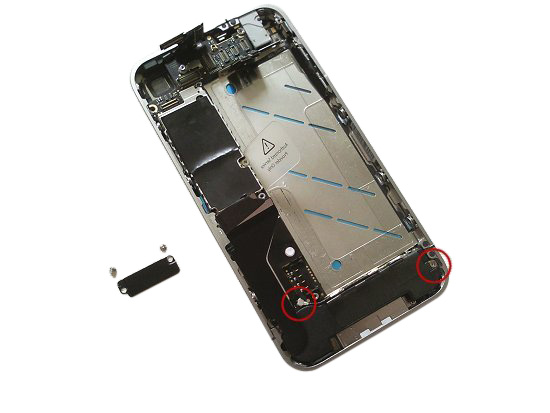
Now remove the two circled screws and disconnect the ribbon cable underneath. Again it has a plug and socket type connector.
With the ribbon cable disconnected your phone should look like below.

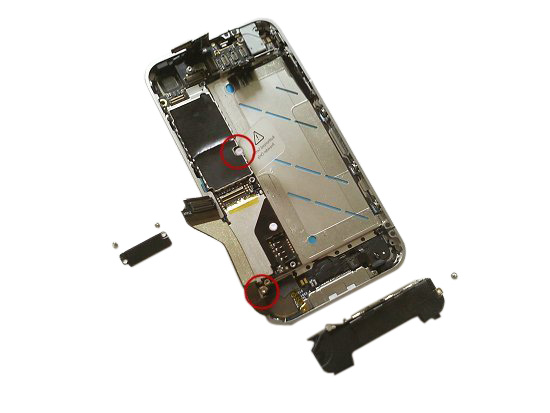
With the antenna/speaker box removed your phone should look like below. Lift the long ribbon over to reveal another screw, circled bottom left. Remove this screw. There is a second screw to remove in this stage which is covered with a white sticker. Simply push this off with your screwdriver then remove the screw. Now carefully lift the circuit board away from the main body of the phone.
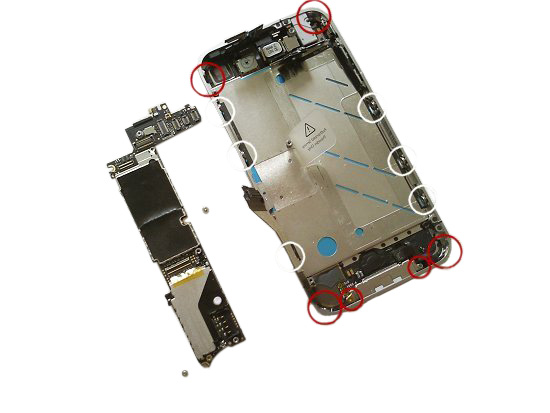
With the circuit board removed, your phone should look like below. A number of screws now need to be removed. These hold the screen in place. The screws circled in white are a different size to those circled in red and also have washers behind them.
With the screws removed, your phone should look like below. There are a number of other screws but they don't need to be removed at this stage.
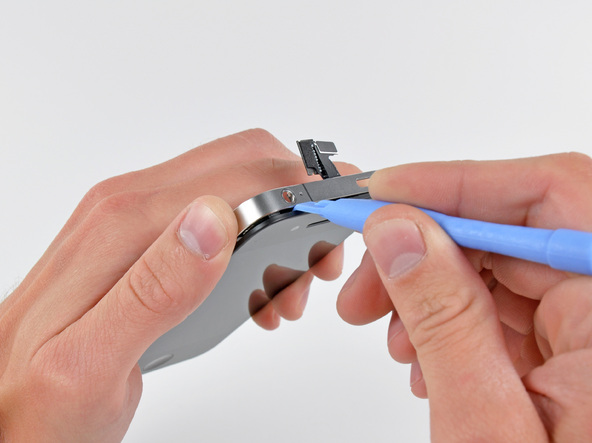
Now run a pry tool along the join of the screen in order to free it.
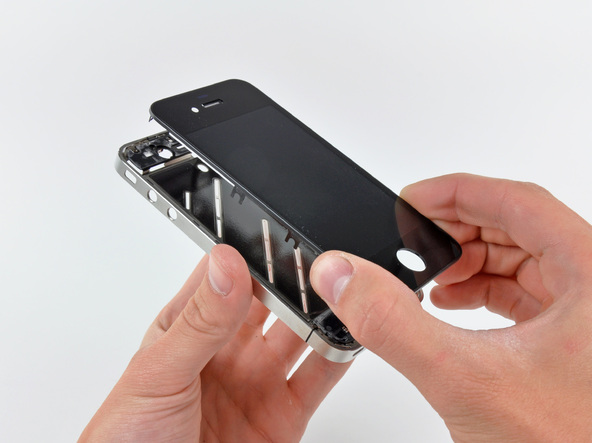
With the screen removed your phone should look like below. If you only want to replace the LCD screen, you don't need to follow the guide any further. Reverse the whole procedure for reassembly.
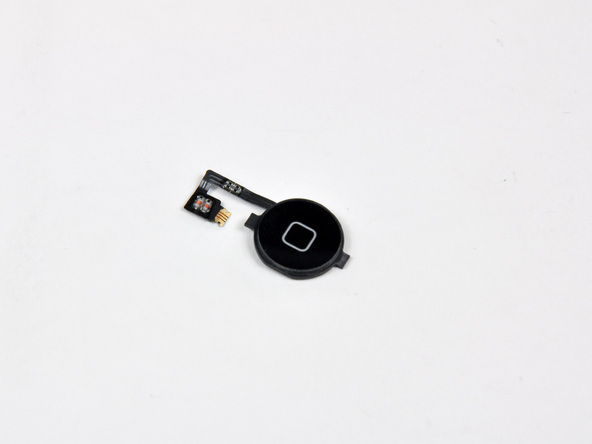
If you want to remove the home button, flick the black latch up, in the direction indicated by the white arrow and carefully pull the home button from the other side. To remove the charger socket, carefully peel away the long ribbon in the direction indicated by the red arrow.
To remove the front camera, lever the metal shield, indicated by the arrow, and then carefully lift the camera out. The earpiece, circled, can be levered out if required.
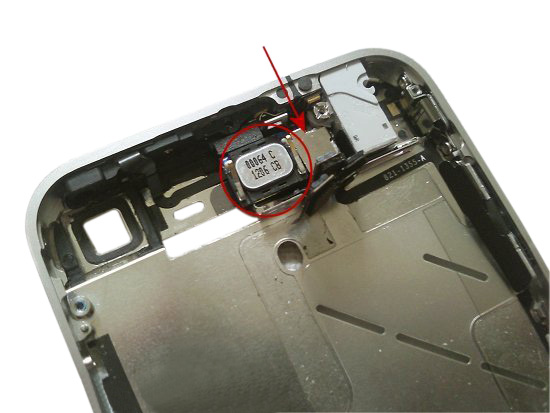
Below you can see the phone having removed the home button, front camera and charger socket/long ribbon cable. Reverse the whole procedure for reassembly.
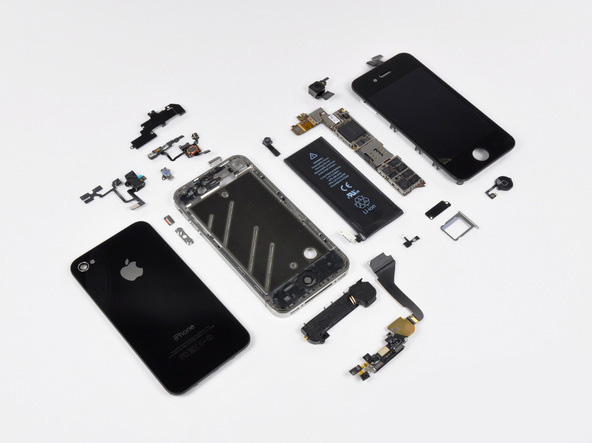
Congratulations, you have just disassembled your iPhone 4G! Here you've got spare parts: back cover, front glass, battery and camera lens, home button and etc. Now you can replace any spare part and go on enjoying your iPhone!
This article isn`t a blueprint for action. You are the one who is responsible for assembling or disassembling of your cell phone. Please notice, that after you disassemble your phone by yourself you`ll be deprived of gurantee. If you are concerned about damaging your cell phone, we strongly recommend you to consult the technical specialists, who have experience in the field of cell phone repair and are good experts in cell phone flashing, LCD or touchscreen replacement.
