How to disassemble the Samsung Google Nexus S.
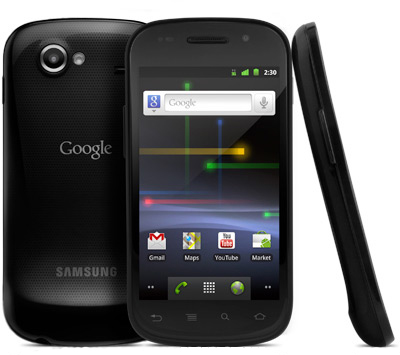
Nexus S is the next generation of Nexus devices developed by Google and Sasmung. It is multi-task cellphone with the Android 4.0 Ice Cream Sandwich OS which brings an entirely new look and feel to Android, quickly swithches between apps. Absolutely buttonless phone, with a 1.2 GHZ dual core processor and a 4.65" HD (1280 x 720) Super AMOLED display.
Nexus S has some good features that make it stand out from other Android phones on the market, such as a curved display and the newest 2.3 Gingerbread update.
It`s not just an optical illusion, the Nexus S is smiling at you! Nexus S has a fancy feature - Contour Display, meaning the display glass is slightly curved to be more ergonomic to users.
Let`s start to disassemble our Samsung Galaxy Nexus S.
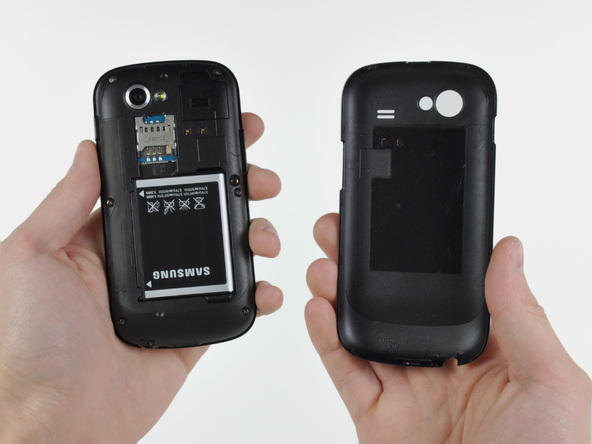
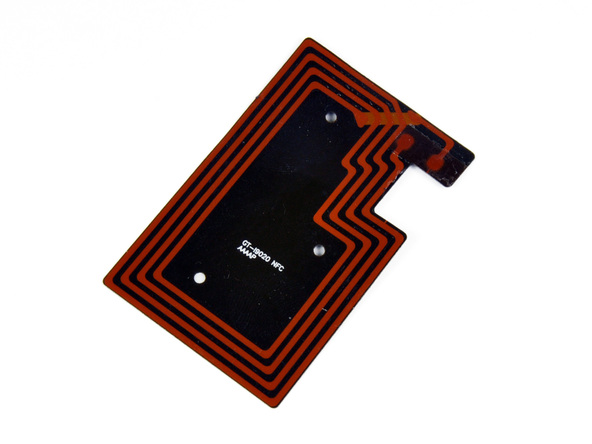
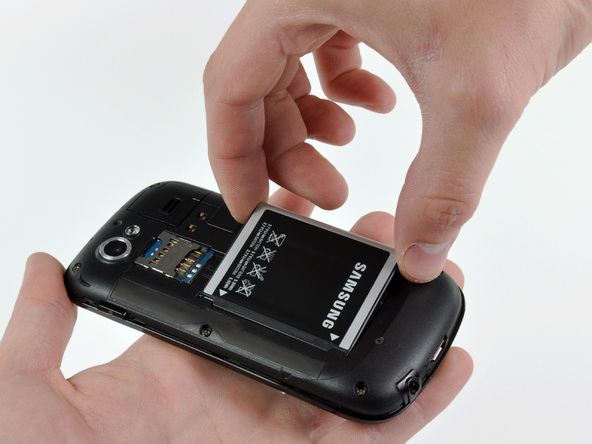
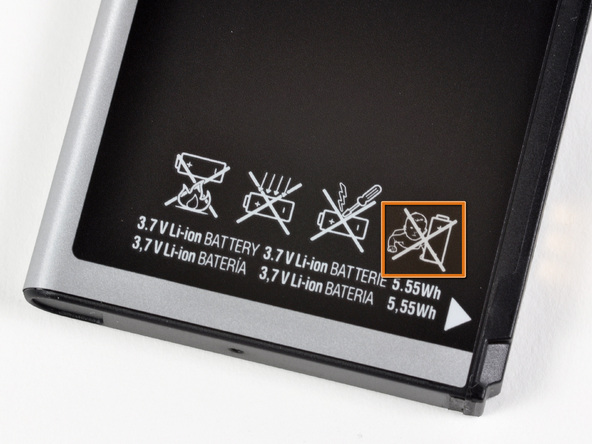
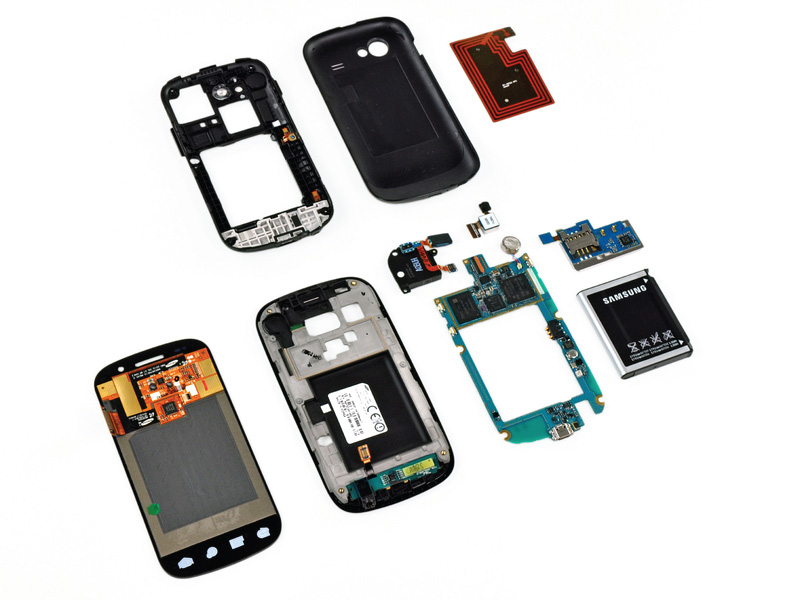
- The entire back cover comes off immediately without any fuss. Under this cover we found the battery. We used a plastic opening tool to easily remove the NFC antenna module from the back cover. The 3.7 V, 5.55 Watt-hours Lithium ion cell provides up to 6.7 hours of talk time on a 3G network, and up to 14 hours on a 2G network, capacity - 1500 mAh. Don`t give this battery to a baby.
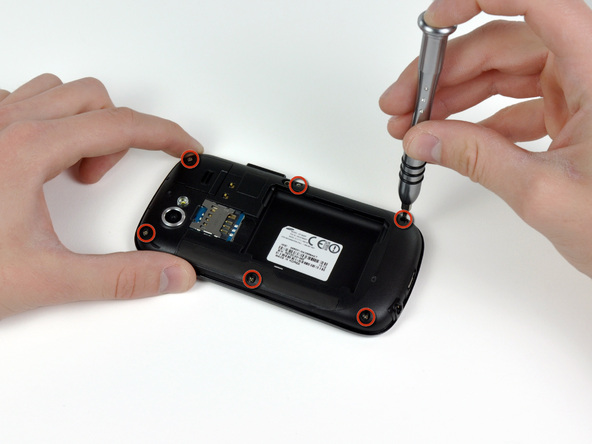
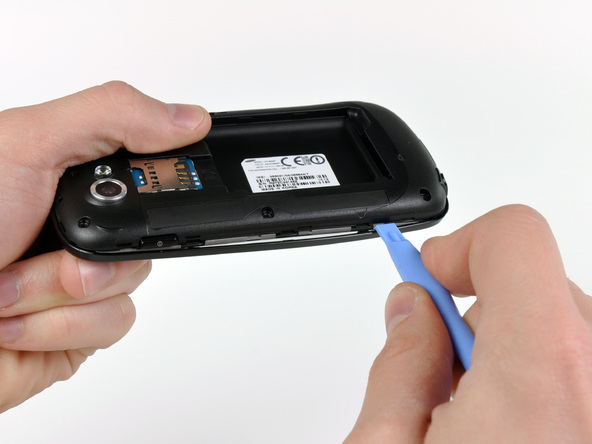
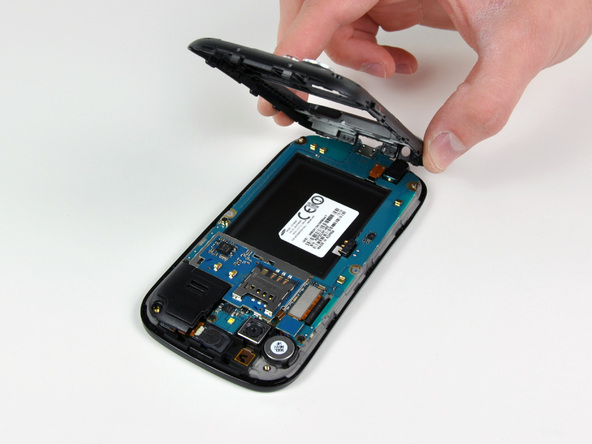
- Remove 6 screws with #00 screwdriver. On the middle panel to remove the inner case.
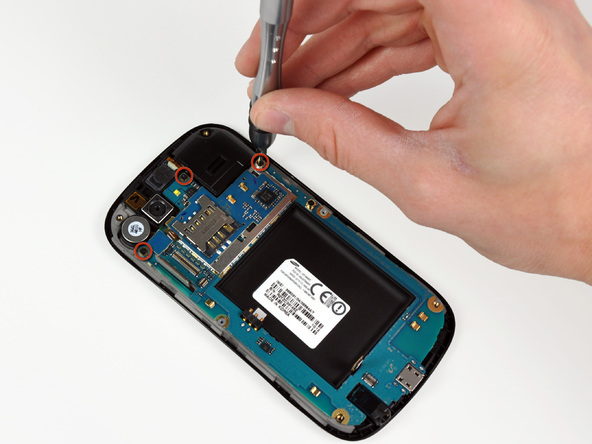
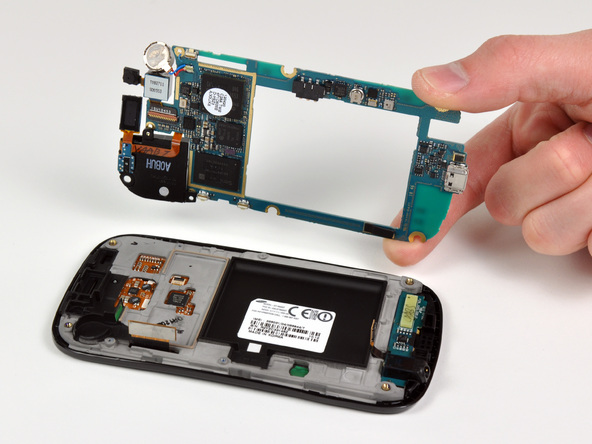
- In order to extract the motherboard from the case, all to do you need to unscew 3 screws and disconnect a few cables. This specially designed motherboard completely encloses the battery.
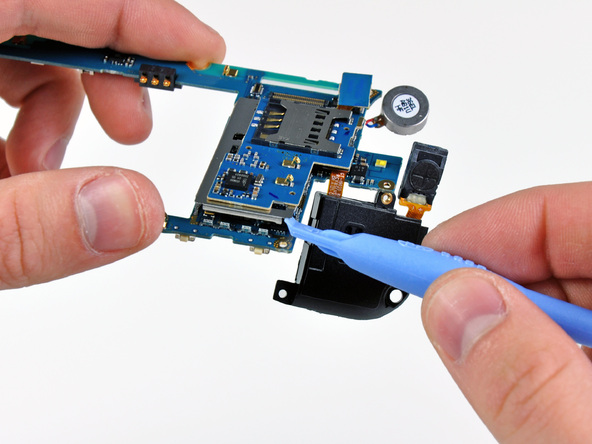
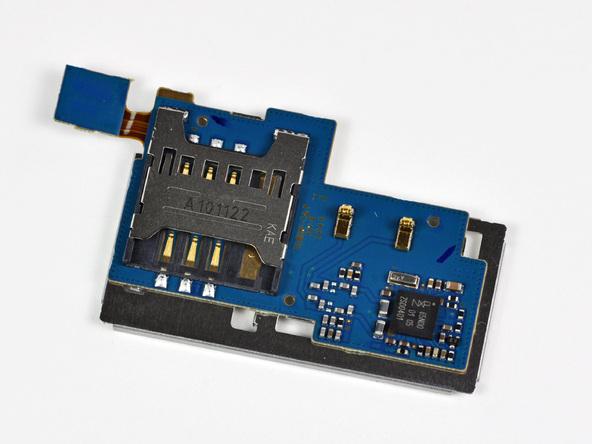
- With the help of the plastic tool separate SIM card reader from the rest of the motherboard.
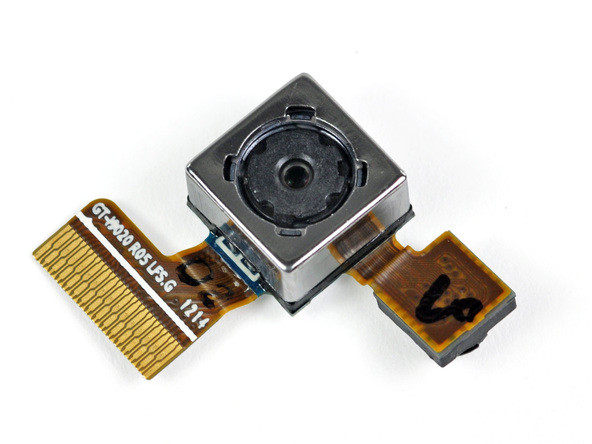
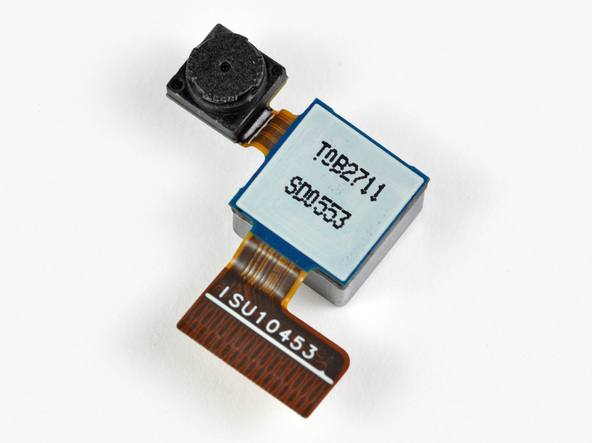
- Samsung Galaxy Nexus S features both front and back cameras, both cameras share the same connector to the motherboard and must be removed only as a singular unit. The front VGA camera provides a resolution of 640 x 480 pixels.
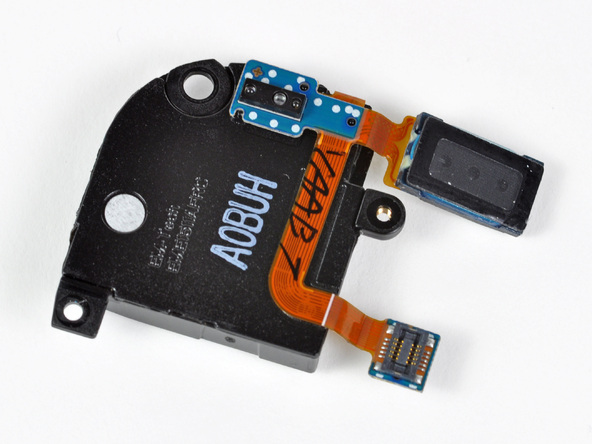
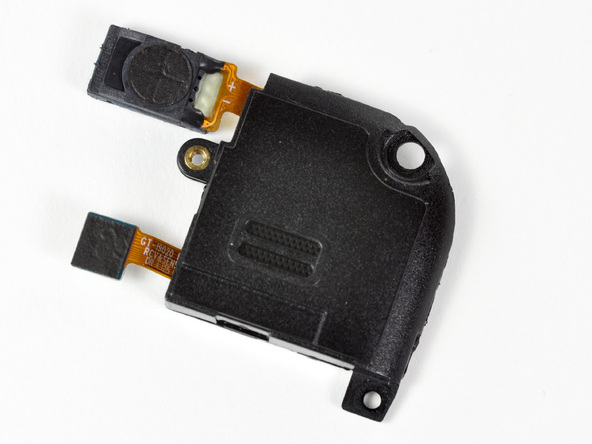
- The all in one EM-Tech EME1511AFRC contains loudspeaker, earpiece speaker and a sensor bank with a single connection. This is a big step to integration, but at the same time forces to replace the entire unit if only one component malfunctions.
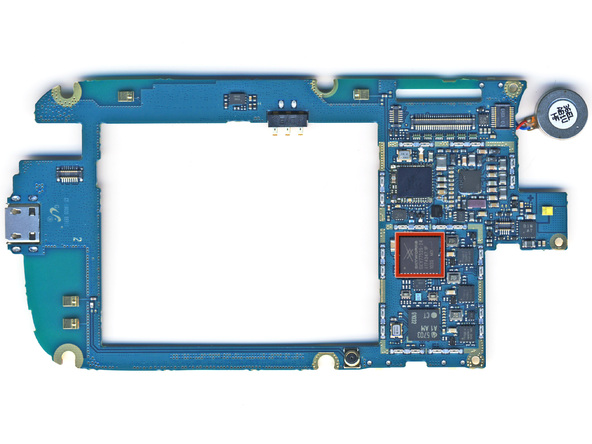
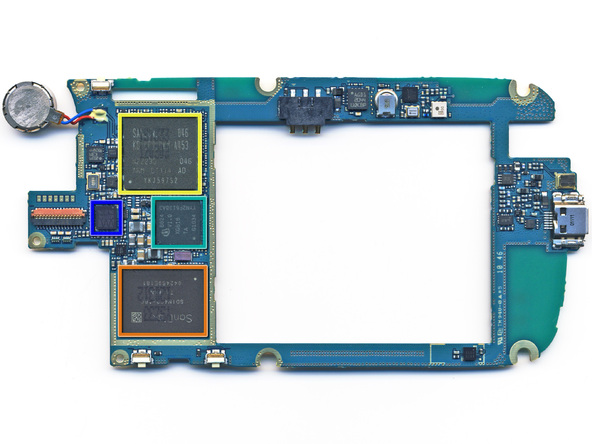
- On the motherboard you can find following additional elements:
- Skyworks SKY77529 Tx Front-End Module for Dual-Band GSM / GPRS / EDGE (in red frame).
- SanDisk SDIN4C2 16GB MLC NAND flash (in orange frame).
- Samsung KB100D00WM-A453 memory package and S5PC110A01 1GHz Cortex A8 Hummingbird Processor (in yellow frame).
- Infineon 8824 XG616 X-Gold baseband processor (in green frame).
- Wolfson Microelectronics WM8994 ultra-low power audio codec (in blue frame).
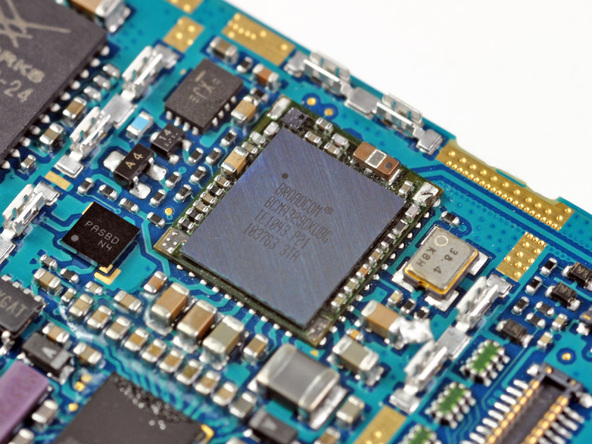
- The Broadcom Wi-Fi chip is hidden underneath the EMI cover. The chip is labeled BCM4329GKUBG TE1043 P21. According to UBM Techinsights, the chip is a low-power package with 802.11n, Bluetooth 2.1, and FM capability. The first chip of this type was used in the 3rd generation iPod Touch.
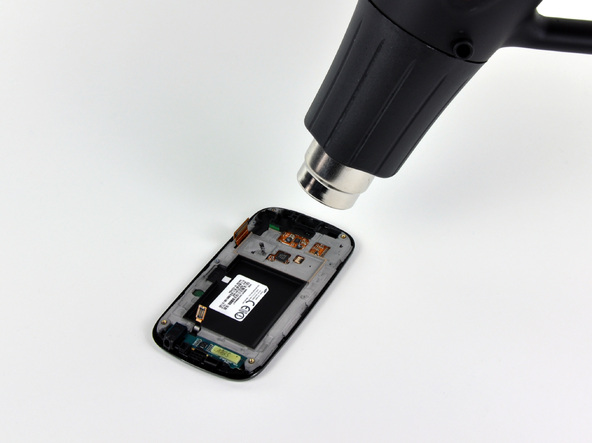
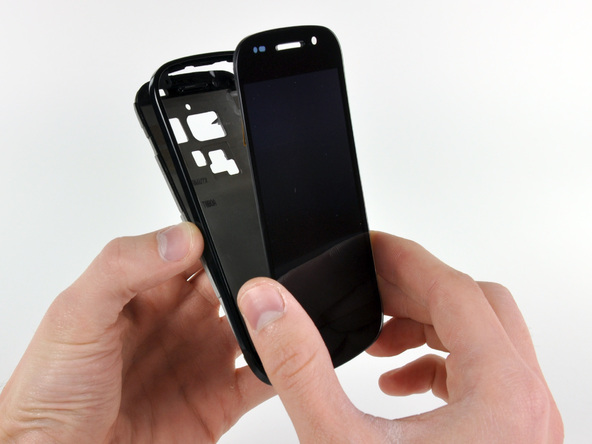
- It was rather difficult to remove the display, but a heat gun helped us to remove front case assembly.
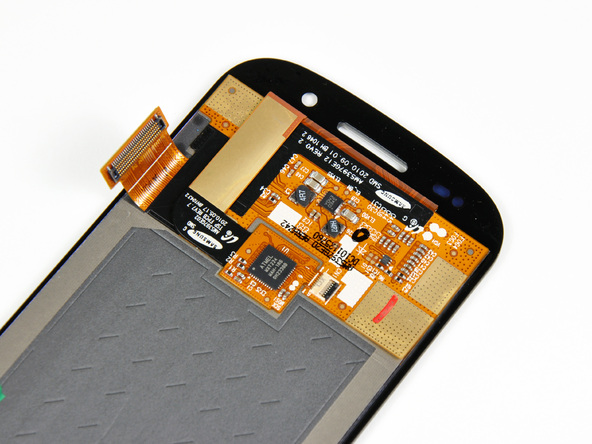
- Under display is our super AMOLED display is attached to the front glass panel. The digitizer is between the glass and the display. You can see that only the front glass panel is curved. The rest of the components are flat as a board, just as in any other phone on the market. Also you can find the PCB on the back of the display with an Atmel MXT224 touchscreen controller is located on it.
- The Samsung Google Nexus S is now successfully disasembled. The battery is very easily replaced - just remove the back cover to swap it out. The motherboard comes out easily once you`re inside, as it`s held in place by regular screws and connectors. A lot of the phone`s components are modular, meaning that they`re simple to replace, but cost more as replacement parts. The front panel is attached with adhesive instead of screws, so it`s harder to take off than on the iPhone.
This article isn`t a blueprint for action. You are the one who is responsible for assembling or disassembling of your cell phone. Please notice, that after you disassemble your phone you`ll be deprived of gurantee. If you are concerned about damaging your cell phone, we strongly recommend you to consulting a technical specialist, who has experience in the field of cell phone repairing and are good experts in cell phone flashing, LCD or touchscreen replacement.
